
RECIPE
We are excited to bring you recipes from our favorite creators. Here Brittany Boles of Seaspell fiber shares with us her favorite vine charcoal making recipe. If you try it, let us know and tag us @botanicalcolors & @seaspellfiber.
Materials
- Fire and fuel for several hours of burning: wood burning stove, ceramic tandoor, chimenea, fire pit, charcoal grill, etc.
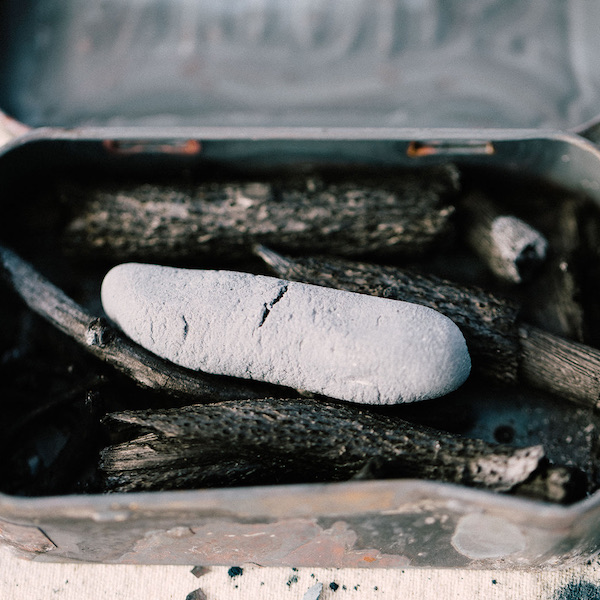
- A metal charcoal “kiln” can be made from any reusable clean tin with a lid. Including but not limited to tea, gum, candle, postcard, mint or cookie tins. Check your local second-hand shop/ Buy Nothing group first or the local hardware store for a new unlined paint can with a lid.
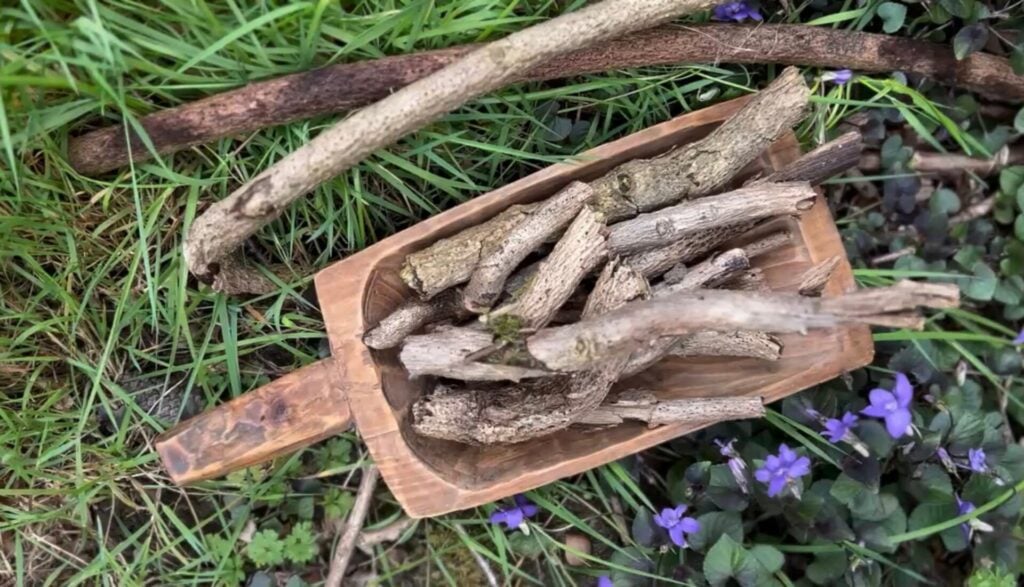
- Local dried wood or vine prunings (avoid new green growth)
- Dry sand (optional)
- Hammer and nail
- Knife for removing bark (optional)
- Fire safe tongs
- Oven mitts
- Fire extinguisher
- Respirator mask
- Coffee grinder or mortar & pestle
- Fine mesh sieve (I prefer 120 mesh for very fine powder)
- Large piece of paper
Skill Level
Beginner
PREP

30 min to 1 hr for wood & kiln prep and optional grind/sift.
MAKING
Burn : 30 min -1hr for charcoal burn
TOTAL
Approx 2 hours total.
This recipe is for a beginner looking to make their own natural art materials. This is for adults only as you will be working with heat. Little fingers can use the charcoal once made.
Wisteria Vine Charcoal
Fire and human evolution have been immortalized through the lore of prometheus, crows, and coyotes who all captured the sacred element from the sun gods. These tales depict fire as a stolen commodity foreshadowing its potentially destructive nature, but when employed with respect fire leaves behind generous gifts. Charcoal is one of the oldest pigments utilized in prehistoric cave paintings along with red and yellow ochres and white chalk, but there is nuance from the charcoal used for cooking to the charcoal pigment desired by the painter. In my first lesson with artist Ruben Arizpe, I learned that while black pigment is rare in nature’s palette, the simultaneous power of its absence & presence is always felt. In certain classical schools of art, the entire rainbow is off limits until a student shows mastery of shadow and light with charcoal alone.
What is different about drawing charcoal? Charcoal is pure carbon which is created by heating wood and other organic materials above 400° C/750° F in an oxygen-starved environment. This process is known as pyrolysis which comes from the Greek Pyro “fire”, “heat”, “fever” and lysis “separating”. Softwoods like the willow and the grapevine are historically some of most desirable sources for charcoal drawing, along with the occasional hardwoods elder, european spindle, & hazel. All impart varying respective soft, medium, and hard qualities to the charcoal end product.
I’m lucky to forage my most local charcoal source in the backyard from wisteria vines that fall over the fence from my neighbor’s annual pruning (a good practice with wisteria as the plant is highly invasive in my region) and I reuse metal cookie, tea and mint tins gifted from a neighboring artist with an extensive metal scrap collection.
Best wood for charcoal: The best local charcoal source is always one that you have abundant and ethical access to, like invasive english ivy vine or himalayan blackberry, which always need pruning back. Seek out your local land conservancy and volunteer for invasive remediation efforts to gain access to abundant charcoal opportunities. Let us know what you try and tag @seaspellfiber + @botanicalcolors on instagram.
Safety Tips & Requirements
- Use safe fire protocol with a fire extinguisher and fire tongs at the ready.
- Metal kilns should be free of paint or embellishment inside.
- If your metal kiln and lid create an air-tight seal (ie. new paint cans lids will create an airtight seal, while most mint tins are not airtight), utilize a hammer and nail to poke several holes in the top of the lid to allow gasses to escape and avoid a potential explosion.
- Wait for the metal kiln to cool completely before opening with care/oven mitts.

Wood/Vine Notes:
- Avoid new, green growth, utilize older “dead” branches/vines.
- Remove any thick bark from sticks before burning.
- Depending on the wood/wine you use, your sticks will shrink from one half to a third of their original size.
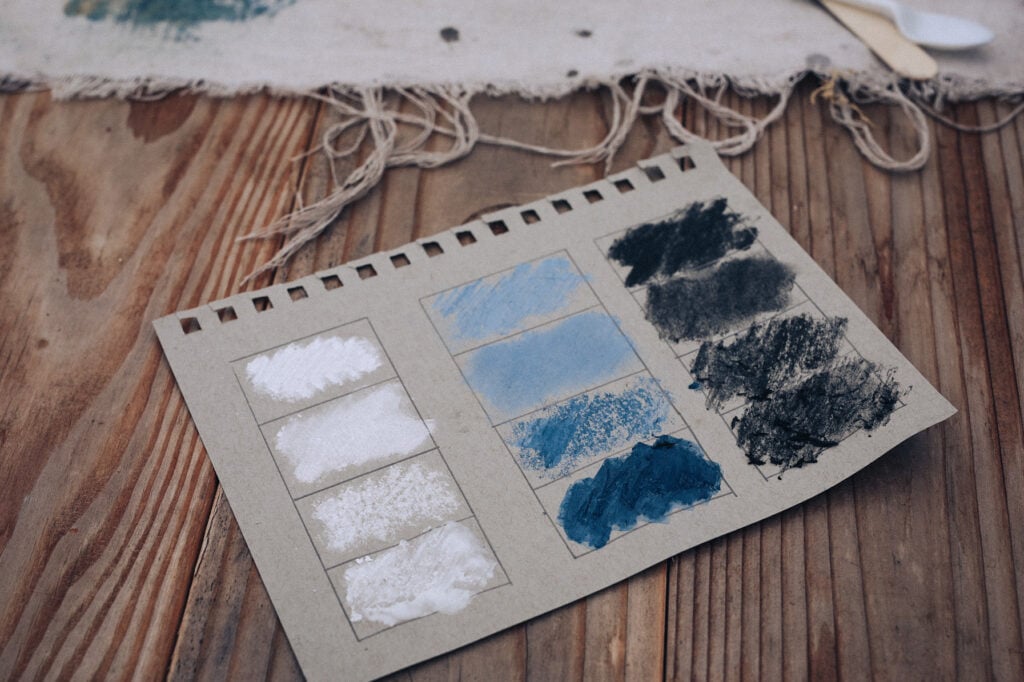
- Softwoods produce charcoal with generous pigments with lots of “give”, great for blending, are crumbly, and will create darker pigment than hardwoods.
- Hardwoods produce charcoal great for sharp lines and allow control no for fine details but provide lighter values than softwoods.
- Length of burn time and vessel options all create nuance in final outcomes.

Make vine charcoal in 5 steps:
- Gather enough old vine to fill your metal kiln/s and hammer several vent holes in the lids with a nail if the vessels are airtight. Optional: Sand can be used to cover the vines inside the kiln to regulate the burning process to ensure a more consistent charcoal quality; acting as a heat insulator and allowing for a more controlled char.
- Ensure your fire source (wood-burning stove, fire pit, charcoal grill, etc.) has enough existing coals/wood to burn for several hours.
- If using wood, I prefer to wait for the fire to burn down to create hot coals. Using fire safe tongs, place the metal kiln into the fire and bury under the coals for 1-2 hrs ensuring the fire has enough fuel/wood to keep it burning the whole time.
- Use tongs to safely remove the tin kiln and place on a fire-safe surface to cool completely before using oven mitts to carefully open the kiln.
- If desired, use a coffee grinder or mortar & pestle to grind the charcoal vines. Then sift the charcoal powder using a fine mesh sieve onto a large piece of paper (creased in half for easy transferring).
- Your vine charcoal is now ready: Utilize your favorite binder for pastel-making or mull the pigment for paint-making or transfer ground & sifted charcoal into a container for indefinite storage until ready to use.