
I’ll admit I am a latecomer to eco-printing, but now find it quite useful to extending dyestuffs that have had one life making a dyebath, but the bulky residue and stuff that gets strained out is still full of color. I prefer used dyestuffs for eco-printing as there’s usually so much dye left in the ingredients and to me, they aren’t quite ready for the compost pile. Plus, once you open your eyes to the amount of color that’s around us, this is a simple way to try out colors you’ve been curious about. Experiment with raw dyestuffs, or tannin-rich leaves, or leftover produce scraps and see what colors develop. Check out the info below for guidelines on how to mordant and dye, and have fun experimenting!
Good eco-print dyestuffs
Other fun things to print with
Other herbal or dye flowers
Leftover bouquets (eucalyptus and fern greenery are treasure troves of color)
Tannin-rich leaves, twigs or fallen bark (oak, maple, sumac, liquid amber or plane trees and many, many more!)
Botanical Colors Eco Print Scarf Instructions
Materials needed:
- 2 lightweight cotton, linen, hemp or silk scarves.
- 2 buckets large enough to hold the scarves
- Very hot water
- 1 quart Mason jar for each scarf
- String or rubber bands
- A covered work surface
- A pot with a lid large enough for 2 Mason jars to fit
- 2 Tablespoons Aluminum Sulfate (alum)
- 4 Tablespoons gallo-tannin or tara powder
- Various natural dyes –marigold flowers, osage, cochineal, logwood. Or you can forage all sorts of interesting plants, or repurpose a wilting bouquet.
- A pair of gloves
The night before you want to make your scarf:
- Fill the bucket with hot tap water so there’s enough room for both scarves to move around easily. Dissolve 4 Tablespoons tannin in hot water, add to the bucket and soak the scarves for 1 hour. Then, make a separate bath of 2 Tablespoons alum in very hot water. Remove the scarves from the tannin bath and dunk in the alum bath. No need to rinse. Stir well. Soak the scarves in the alum solution for 1 hour or as long as overnight, making sure the scarves are not floating and are completely immersed in the solution. The longer you soak, the richer the dye colors will be. You can soak the scarves for up to 1 week in advance and leave them wet or dry them for future use.
Scarf-dyeing day:
- Put on the gloves and remove the scarves from the bucket and squeeze out the excess moisture.The mordant solutions are good for additional fabrics if you want to save it and it keeps for a couple of weeks. It may be safely disposed down the drain when you are done using it.
- Lay the scarf on a protected work surface and arrange it so it’s stretched out.

Osage, logwood, cochineal, marigold flowers
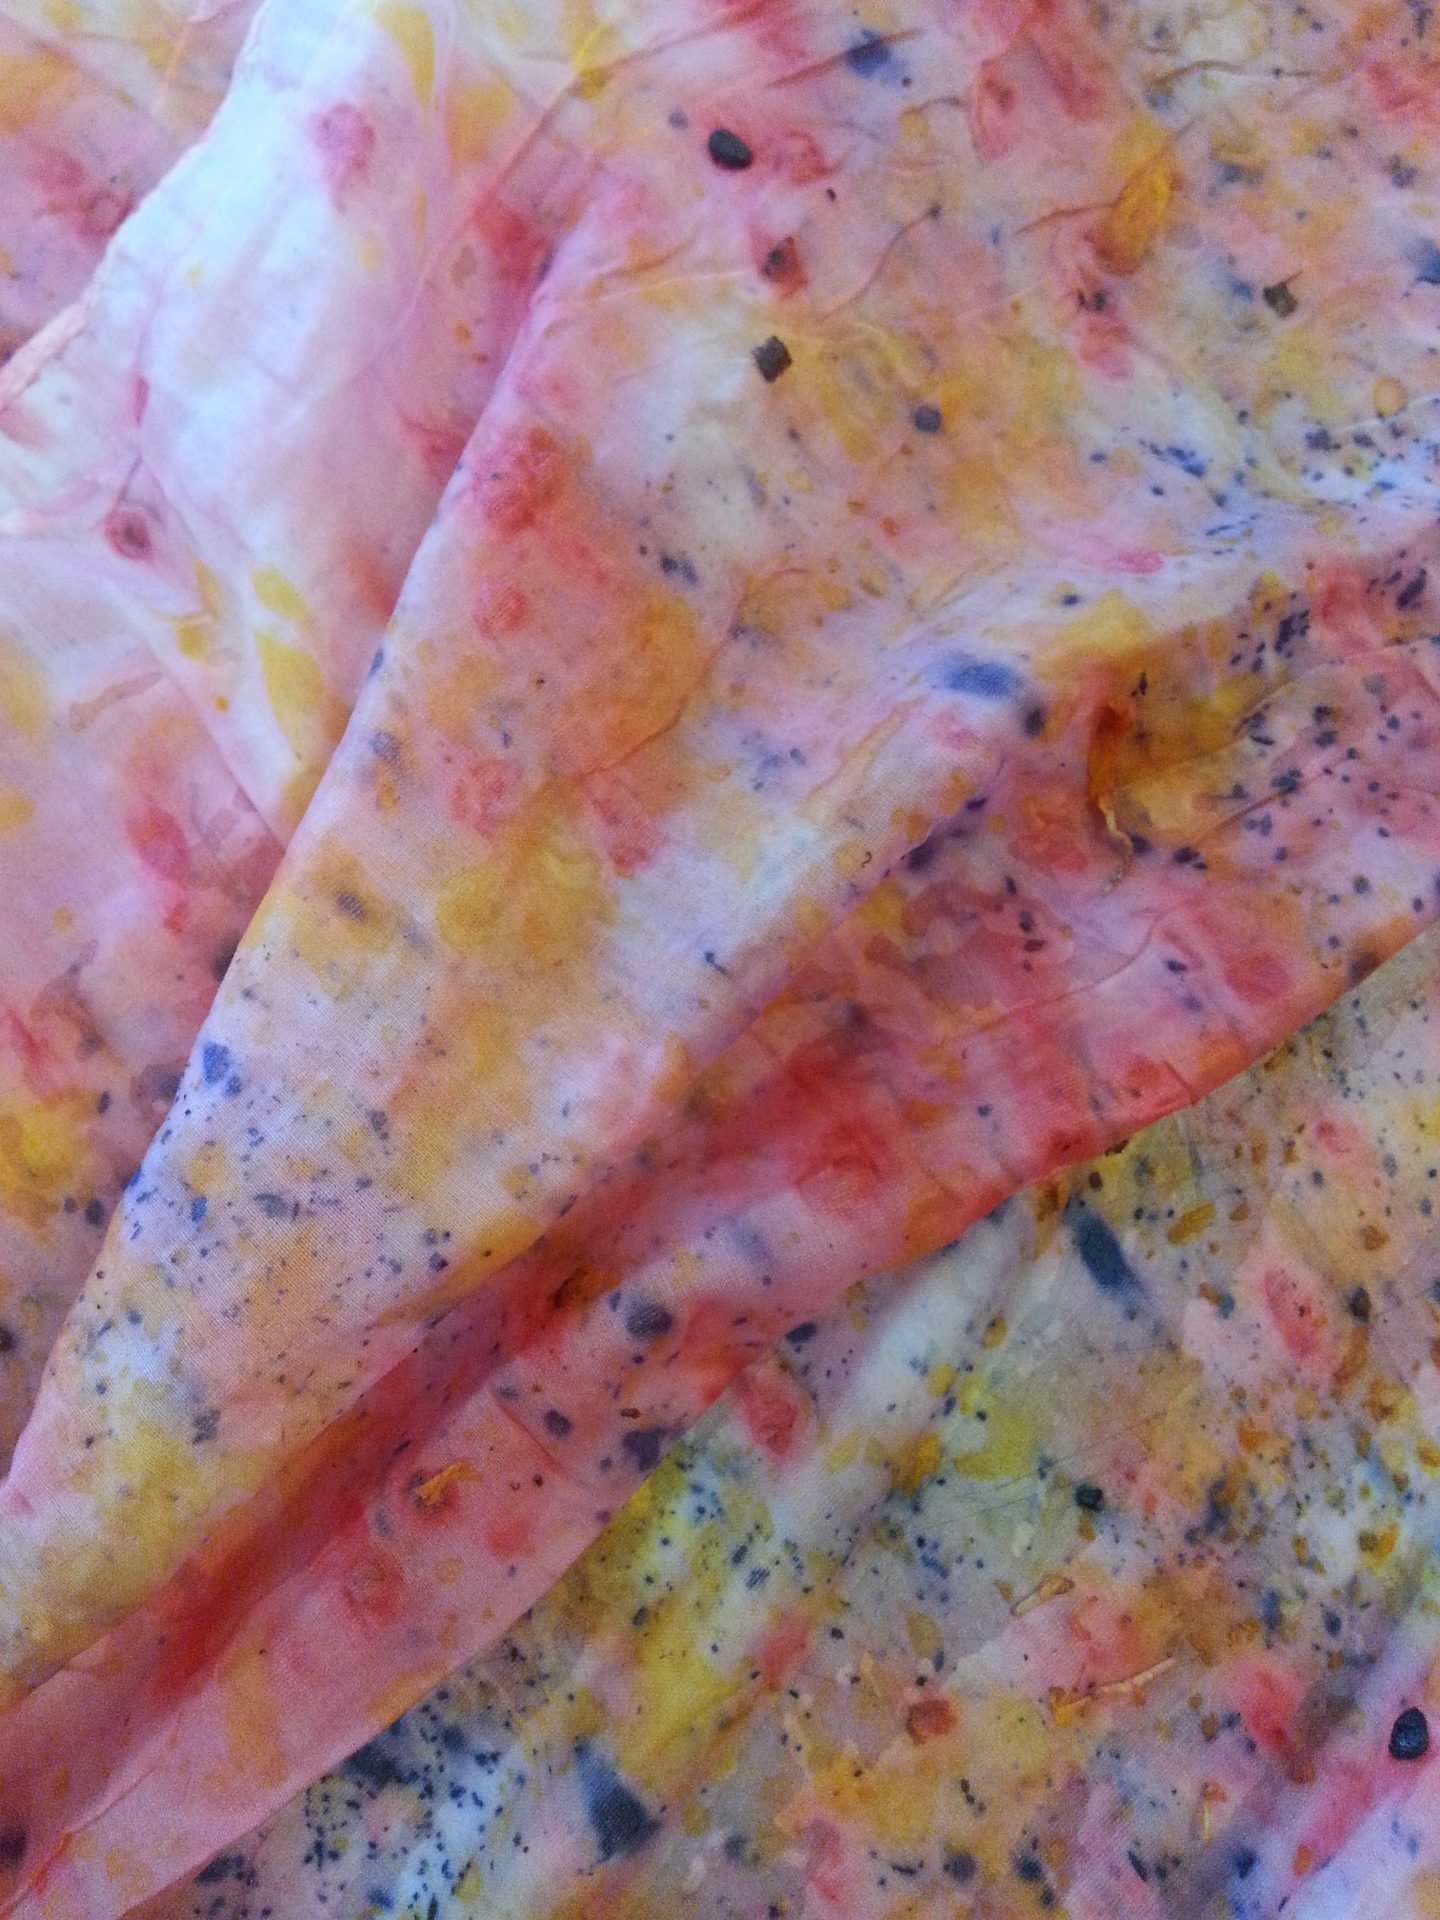
- Sprinkle your choice of dyes on the scarf surface. You have the choice of sprinkling the dyes over half the scarf, and then folding the scarf over so the dyes are sandwiched inside, or covering the entire scarf with dye. Heavy sprinkling will make a dark scarf and light sprinking will make a pastel-colored scarf. Once you have scattered the dyes, roll the scarf into a long tube. If your dyestuffs are in large pieces and you have to fold the scarf into a packet, that’s okay too.

Roll the bundle
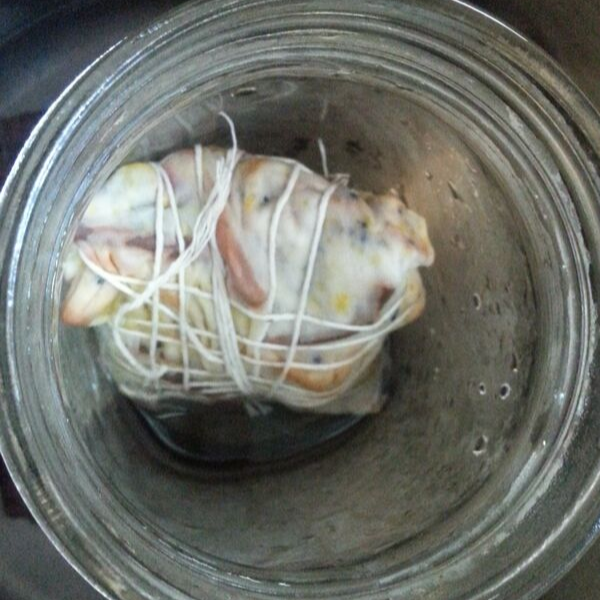
- Coil the tube into a cinnamon bun or a square package.Secure with a bit of string.
- You can either cover the scarf with plastic wrap and leave it overnight for the dyes to soak into the fabric, or steam it.An easy way to steam is to put the rolled up bundle in a quart Mason jar with about 1/4th inch of water in the jar and place the Mason jar in a water bath that comes up about an inch or two up the outside of the jar. Slowly heat the water until it is steaming but not boiling, then cover the pot and let the scarf steam for 1 hour. Add more hot water to the bath if needed. Don’t add cold water or you will crack the jar!
- Let cool.Notice how strong the logwood (dark purple) is!
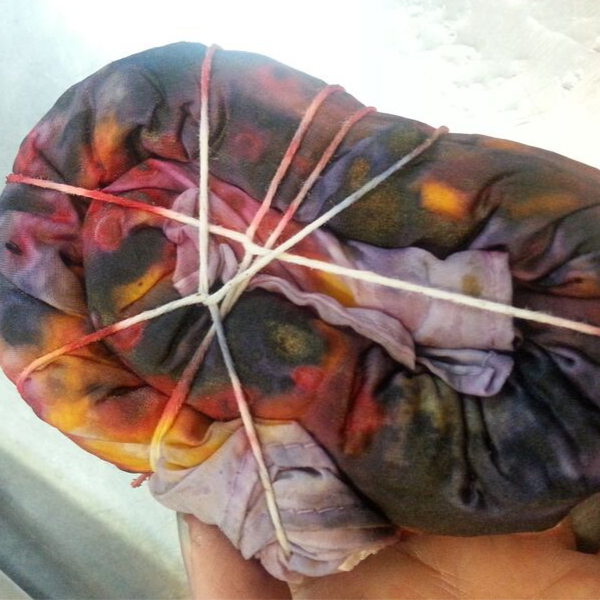
- Undo the string and open up the scarf.The purple black color is logwood, the dark spots are cochineal, and the orange and yellow shades are from marigold and osage. You can save the pieces of dye, air dry them and reuse for another scarf.
- Here are two versions of the finished scarf.The scarf on the left had a very light covering of dyes and the one on the right had more dye on it. Both are beautiful!
