
You can totally create your natural dye garden as easy as 1-2-3 with tried and true dye plants that will keep giving all summer.
It’s spring on Cape Cod. Catbirds, orioles, and osprey have returned and bees hover in the flowers of my rosemary shrub. The seeds I started in winter have now grown up, ready to graduate to the big leagues outside in the garden. The decision of where to place them is like placing pieces of a puzzle: how much sun lands here? how much water will this one need? how tall does this variety grow? And each year, space is an always an issue: there is never enough! Groupings of containers and simply-built raised beds can offer solutions to this problem.
A few things to keep in mind when growing dye plants: you’ll need roughly the same amount of plant material (leaves, flowers, etc) as fabric to be dyed. So it’s a good idea to plant lots of a single variety instead of lots of different varieties. This is also helpful if your seedlings don’t survive or if they get eaten by rabbits; always plant extra! If planting in the ground or in a raised bed, give each plant about a foot of space. If using containers, medium to large are best (12-18” diameter). Sizing up will give the root system enough room to grow.
Japanese Indigo, persicaria tinctoria, is perfectly suited to container gardening. Grow this plant on sunny porches, windowsills, or any space where you can tuck a few pots. Once this plant is about 12-18” tall and the leaves turn blue when crushed, harvest the leaves and let it grow again, just like basil or cut and come again lettuce. If you’ve got more room, build a simple raised bed and place indigo plants in the front for its shorter
stature and easier access come harvesting time. Fertilize with compost or fish emulsion.
Save 20% by purchasing an indigo dye bundle here
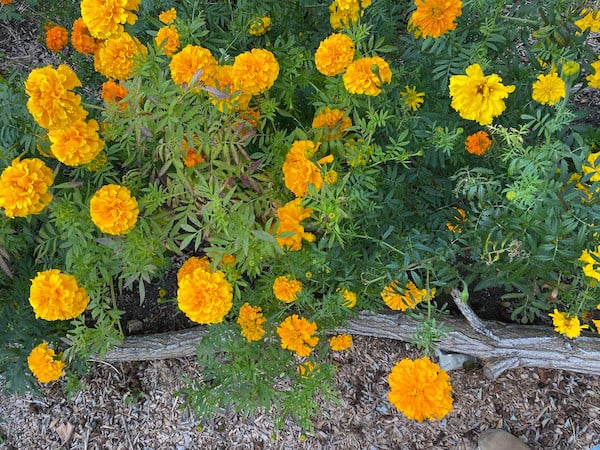
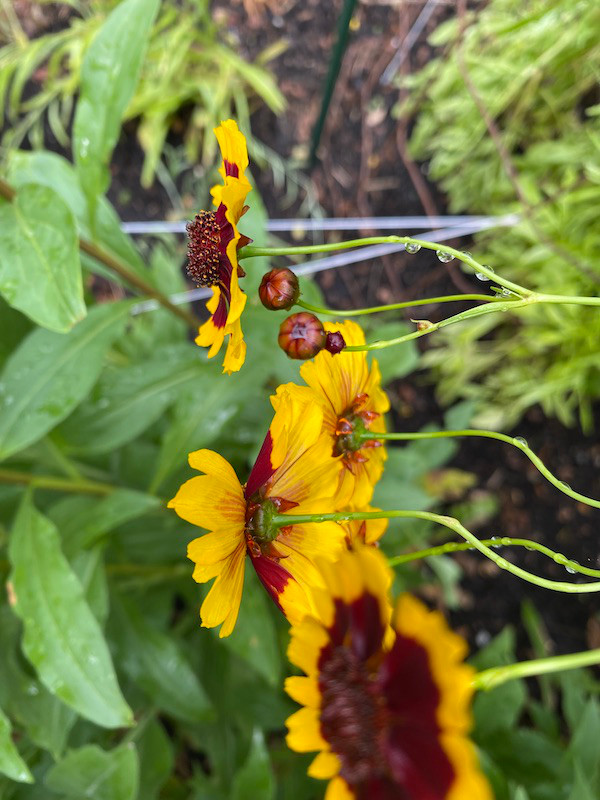
Medium to tall height plants like African Marigolds, tagetes erecta, and Dyer’s Coreopsis, coreopsis tinctoria, are also great container and raised bed options. Place in a sunny spot behind shorter plants like indigo. Consider adding a stake to keep stems propped up during high winds or storms. Pinch flowers often to encourage more blooms throughout the season. Use fresh flowers for dyeing projects or dry and store for later use. With coreopsis, the entire plant from leaves to stem to flowers will produce color; I like to cut my plants down for dyeing in late fall once the plants have gone to seed. Both marigolds and coreopsis are very easy to grow and will thrive in poor soils. Fertilize with compost if you have it, but these plants don’t require much so you can save it for hungrier plants like indigo and Hopi sunflowers.
Regardless of what you grow, remember to save a plant or two for seed. Allow the flowers to bloom and turn brown. Harvest and hang or lay flat to dry. Shake the seeds out and remove the chaff. Store in a dry spot for planting next year.
Spring is a new cycle of growth, color, observation and experimentation. Each time this year, we get to take what we’ve learned and start again. I’ll be starting a new puzzle in the garden, thankful for the dirt under my nails and for the chance at fresh beginnings.
Milisa Moses, is the founder of Plant Work Shop on Cape Cod, MA. Watch her FEEDBACK FRIDAY presentation and access lots of great planting resources here!