Everyone from kids to adults love to get their hands messy when they dye Easter eggs with natural dyes. This is a fun tutorial for adults and kiddos (parents help, please) to make a little Easter magic.
First things first, let’s talk about health & safety:
We always recommend working in a very well ventilated area. Although natural dyes are non-toxic, when using fine powders it’s best to wear a mask, and keep the windows open. Be mindful around little ones and pets as you don’t want anything going in mouths that shouldn’t be there.
Also, when beginning to set up a workspace, if commandeering any kitchen equipment for your new dye projects, please remember to keep dye pots as dye pots, and kitchen pots as kitchen pots.
Also if doing this with kiddos, you will be working with heat so be careful with little fingers and hot dye!
Materials:
- Eggs: I used heritage eggs and hard boiled them (I like to compost with them after!)
- Veggie bag / Cheesecloth / Something mesh like a stocking.
- Eco-print materials of your choosing. We recommend Botanical Colors’ raw dyestuffs like: logwood chips, marigold flowers, coreopsis and our liquid logwood. You can use any of our liquid dyes – you only need one tablespoon to dye a dozen eggs.
- Modifiers : Citric acid or lemons , soda ash
- Equipment (Anything you use for this project should not be used for food anymore.)
- Tablespoon & teaspoon
- Large spoon / stirring utensil
- Bowl
- Small cup
- Steamer setup: A stainless steel or “non – reactive” pot. Natural dyes react to metals! Aluminum can work too but will lend to more subtle darker tones. Experiment with both and see how the colors differ.
- A colander / grill rack / sticks / steamer basket – something to rest your fabric in the pot so it doesn’t touch water!
- Paper to protect your work surface or a plastic or a clean drop cloth
- Mask
- Gloves
- A heat source – open fire, kitchen top, hot plate
- Distilled White Vinegar
Steps:
Prep the eggs!
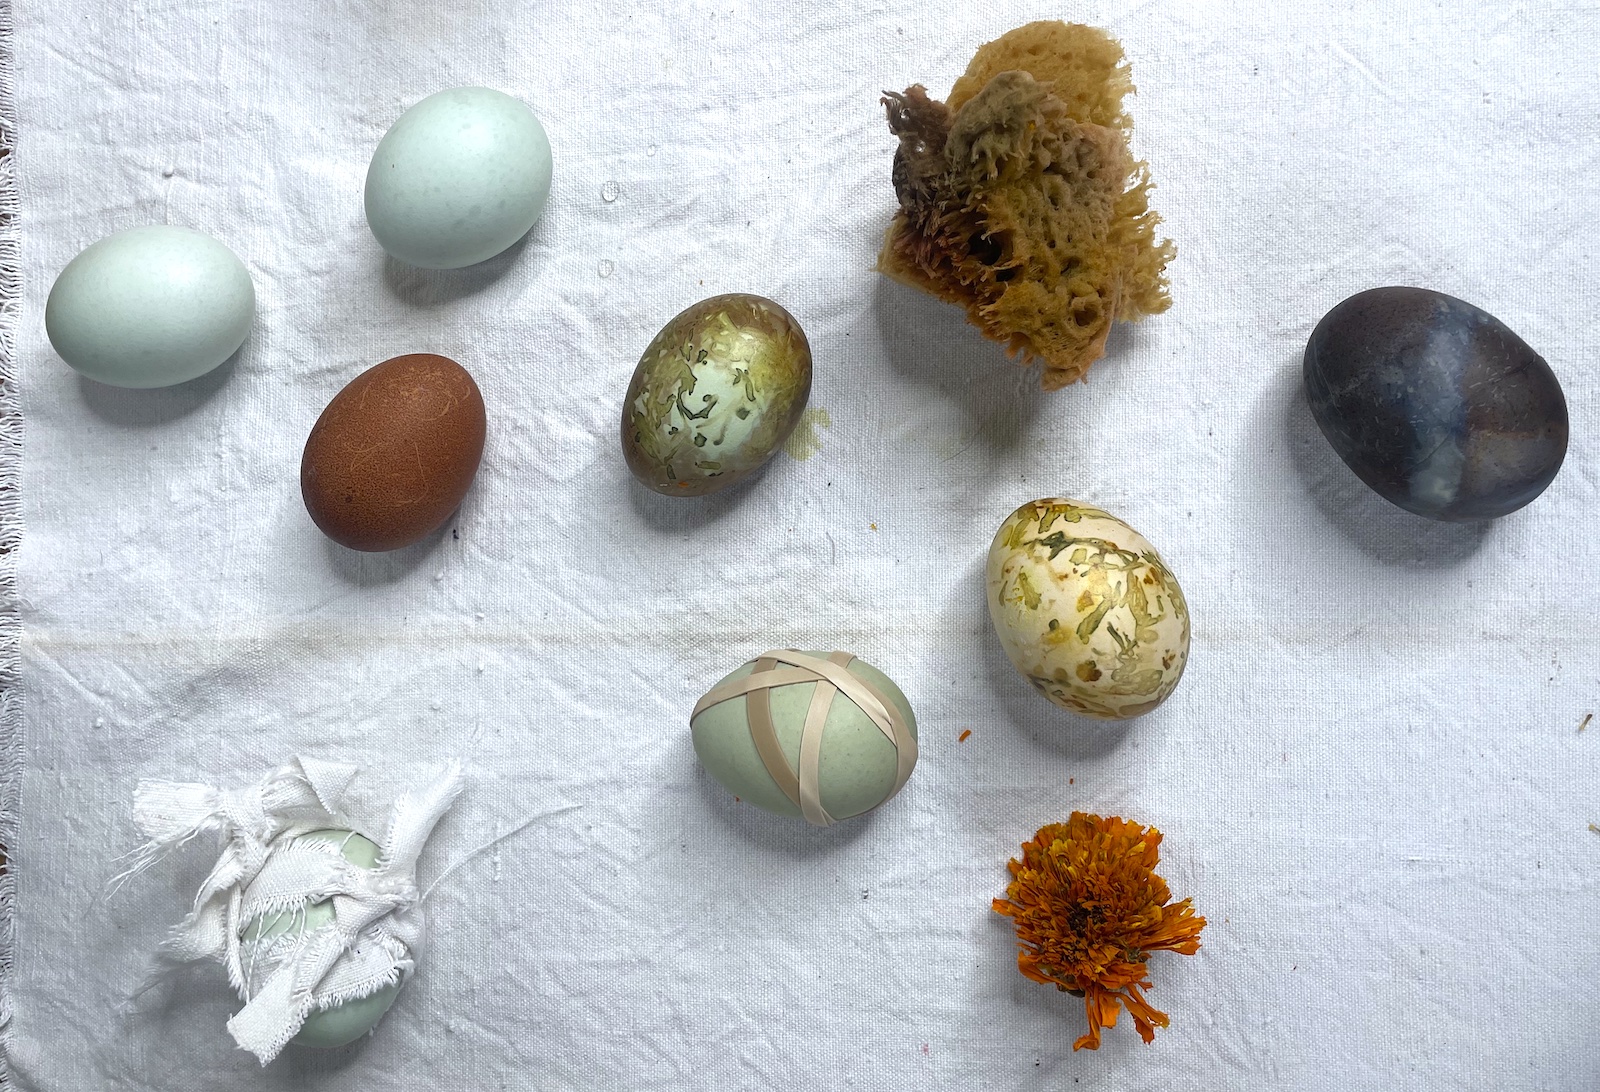
- To start, I used heritage eggs that come in a variety of colors. I liked using the natural blues and browns as natural backgrounds.
- Hard boil your eggs first , this ensures they won’t crack.
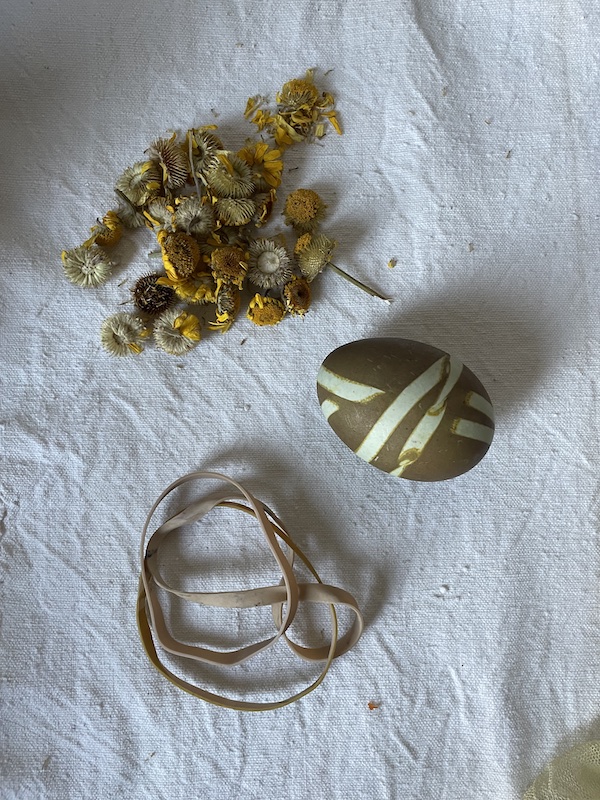
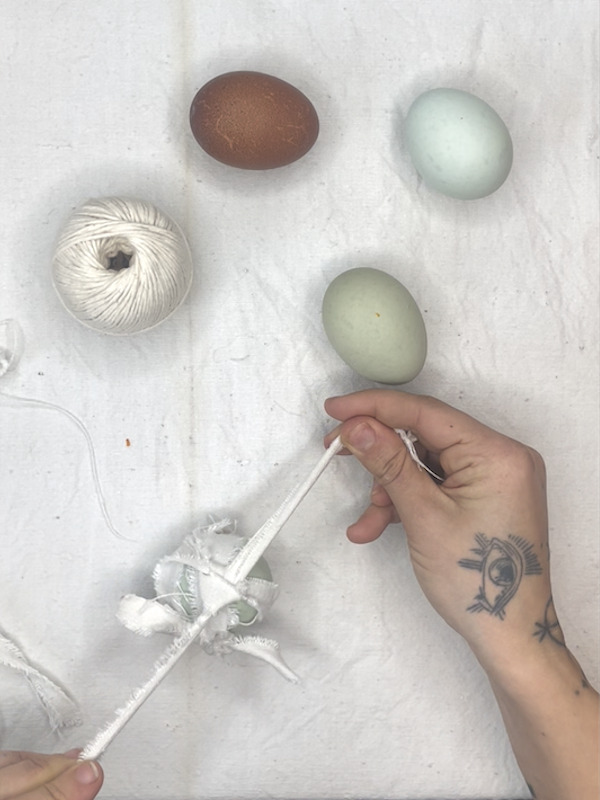
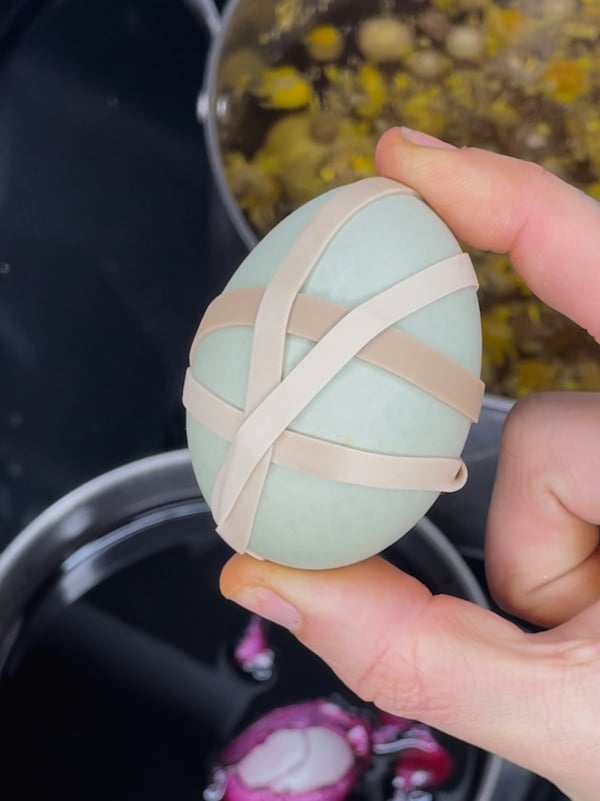
- Prep your eggs with a variety of fun tie – dye techniques, use rubber bands, strips of fabric remnants ( I used our handwoven hemp/cotton yardage irregulars which are great for up-cycling projects )
Making your dye baths:
- Put half a bag of dyer’s chamomile in enough water to hold 6 or 12 eggs. Simmer for 30 minutes. Add one tablespoon of vinegar and stir.
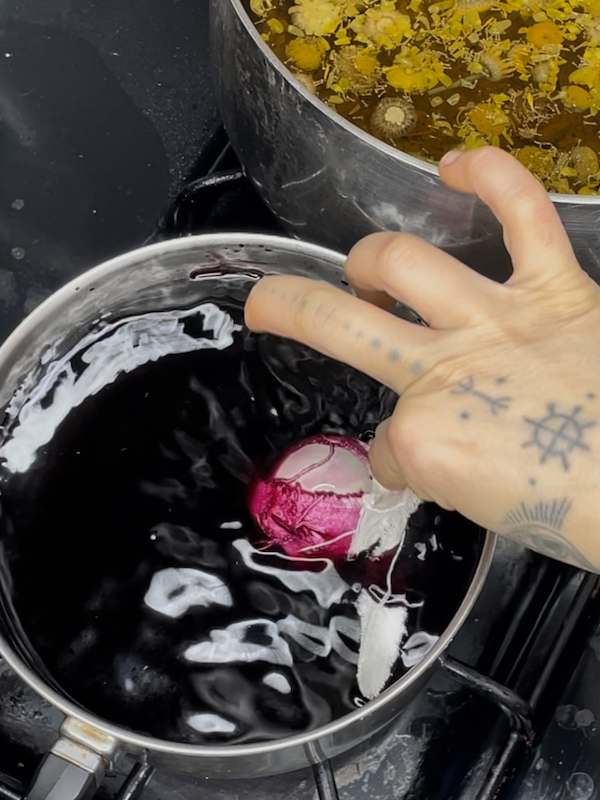
- Heat a small pot of one tablespoon of our liquid logwood.
* You want enough water in each pot to submerge as many eggs as you can . This amount will dye at least 12 eggs!
Bundle dyeing your eggs:
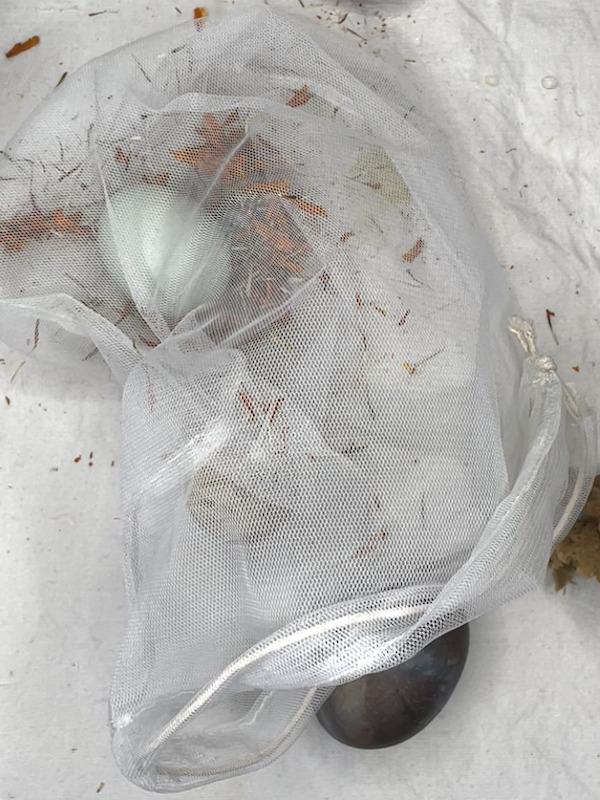
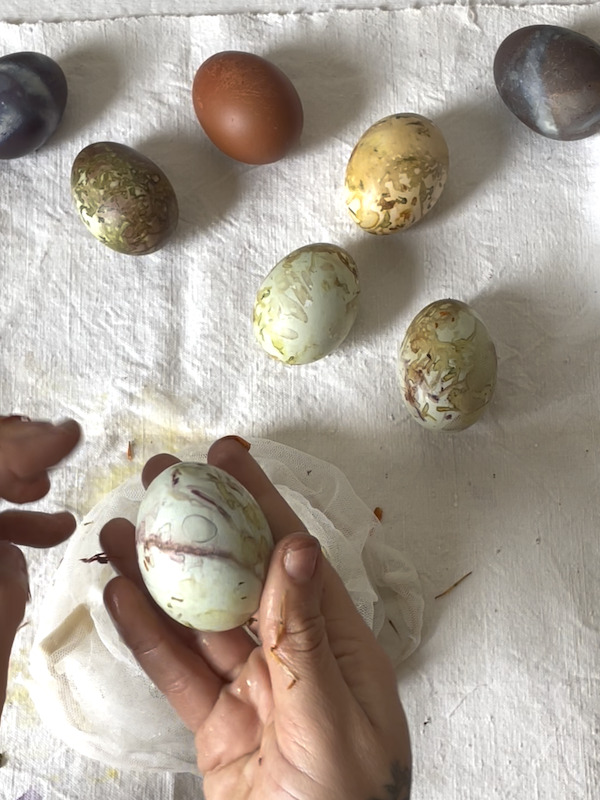
- I packed a mesh veggie bag with all of the eco printing materials listed above. For three eggs, I used one marigold head, a small sprinkling of dyer’s chamomile and a small sprinkling of logwood chips. Tie off the bag around the eggs so that they are able to be squished up with the dye flowers.
- Place your eggs in the bag in a cup of distilled vinegar to wet all the dried flowers. Leave them in there for about 5 minutes.
- Take your colander/grill or steaming device and rest it on top of your pot. You can use normal tap water for this as we just need the steam to make the prints. Place this on top of your stove.
- Now place your eggs in their mesh bag on your steamer contraption, and make sure to cover with a bowl or lid so all of them are fully immersed in the steam.
- Steam over water for at least 30 minutes, adding more hot water as it evaporates.
- When steaming is done, carefully remove your eggs with a spoon and rinse them in cold water. You can also add to a bowl of cold water to help cool them down
- Once dry, shake off any loose dyestuffs – save these and reuse them in another dye project!
Tie-dyeing your eggs:
- I used strips of our fabric along with rubber bands to make fun tie – dye effects! You get to be creative here, there is no right way to tie – dye an egg :).
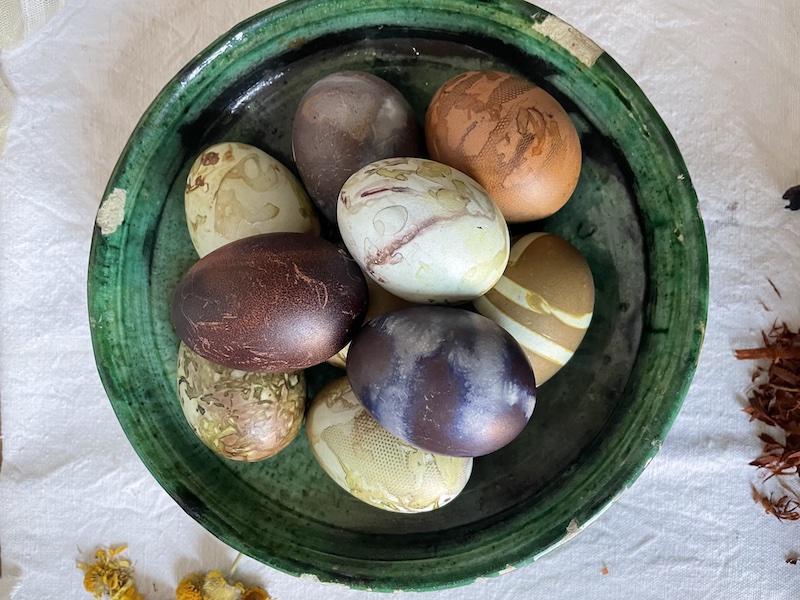
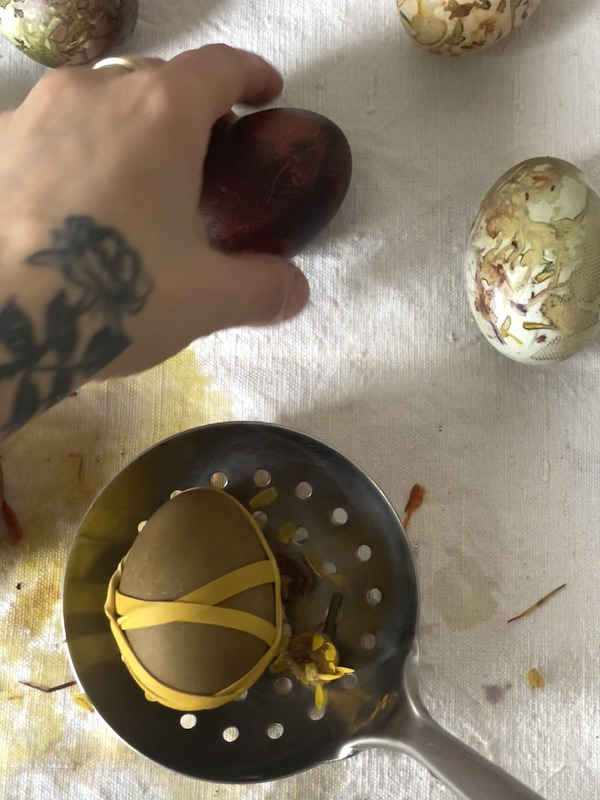
- Submerge the tied up egg bundles in the dyer’s chamomile bath and the logwood bath on a low simmering heat for at least 15 minutes. You can monitor the color but you will get some deep purples and greens!
- Remove your eggs with tongs or a spoon and make sure that you rinse in cold water as they will be very hot!
Fun Tips:
- I also played with rubbing off some marks with a sea sponge for a speckled look.
- If you want to play with shifting the colors, you can use a teaspoon of soda ash for deeper purples in the logwood and sprinkles of citric acid or lemon juice to bring out orange shades.
Please send us your images! We love to see what you are making.
If you enjoyed this fun recipe, you might enjoy taking an Illustrative Play Time: Painting with Tea Paints, Egg Tempera and Natural Dyes class!






These are beautiful! I have one question though, if anything you use for this project should not be used for food anymore, how is it safe to eat the eggs after you dye them?
Hi Rachel!
Thank you for bringing that to our attention. We edited the post and agree! It’s best not to eat the eggs to be safe. You can always drain the eggs with a needle before hand too.
This is a lovely project that our family enjoys each year! However, I was surprised to see Logwood listed as a dye for eggs that are being hardboiled and eaten. The active ingredients in Logwood, hematein and hematoxylin, are toxic whether inhaled, absorbed through the skin, or ingested. It’s a dye to work safely and carefully with, and definitely not to eat as egg shells are porous and we’re going to be consuming some of the dye when we eat them hard boiled. Please correct me if I’m wrong!
Hi Jessica,
Thank you for bringing that to our attention! We agree and switched out the instructions! It is always better to be safe than sorry and confusing! Hope you enjoy creating your eggs this year, we would love to see your pictures.
This is great to do as a project with just the eggshells – make holes at each end to blow out the contents – to use decoratively. On the other hand – this is really the ONLY time I use food to color eggs ment to eat! I have used cochineal for this in the past, but now more aware of allergic reactions to it, so no longer use it for edible eggs.