
A Tutorial For The Natural Dye Newbie!
Bundle Dyeing Harvest & Mill Socks:
Bundle dyeing is a great way to start your natural dye journey. This technique is forgiving, great for covering up stains, up-cycling old garments and giving them a new life with items you have at home!
First things first, let’s talk about health & safety:
We always recommend working in a very well ventilated area. Although natural dyes are non – toxic, when using fine powders it’s best to wear a mask, and keep the windows open. Be mindful around little ones and pets as you don’t want anything going in mouths that shouldn’t be there!
Also, when beginning to set up a work space, if commandeering any kitchen equipment for your new dye projects, please remember to keep dye pots as dye pots, and kitchen pots as kitchen pots. You don’t want to accidentally ingest any extract or mordant residue and have an upset stomach!
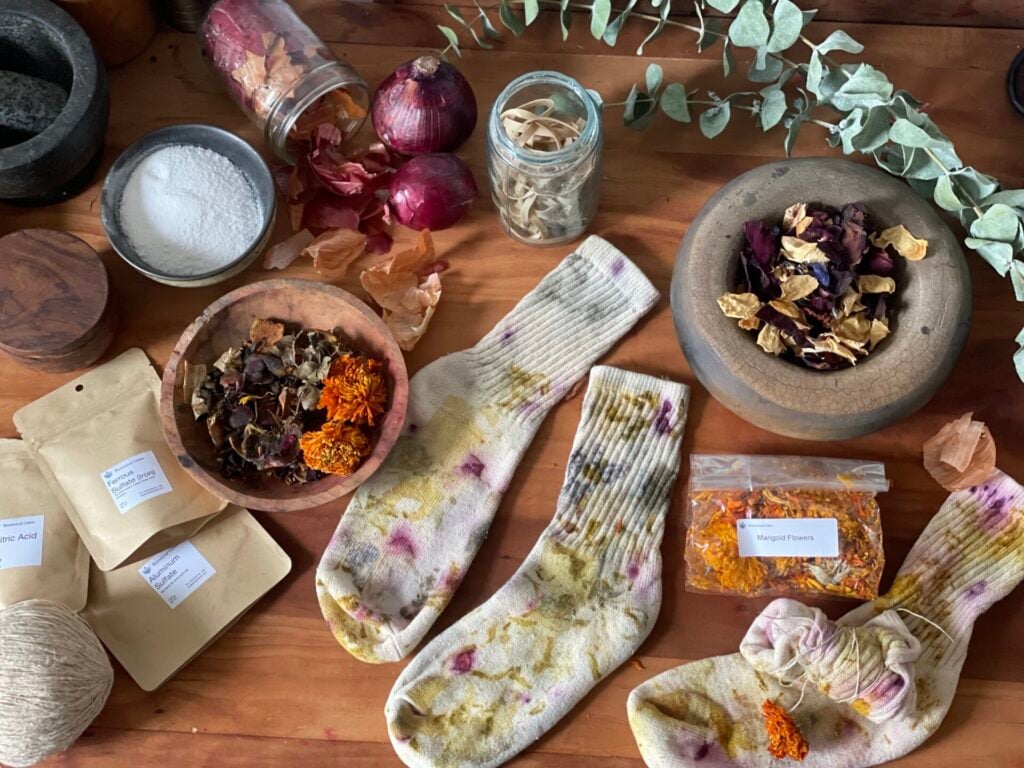
Materials needed :
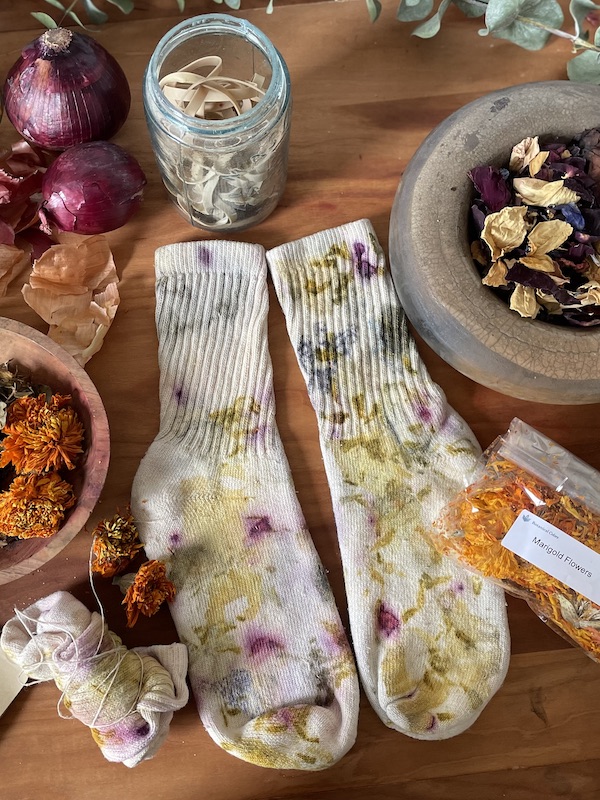
- Pair of cotton socks Harvest and Mill
- Fixative, that stuff that’s like the glue for your color ( aka mordant) : aluminum triformate ( if you’re more advanced and can work outside we recommend substituting this with aluminum acetate )
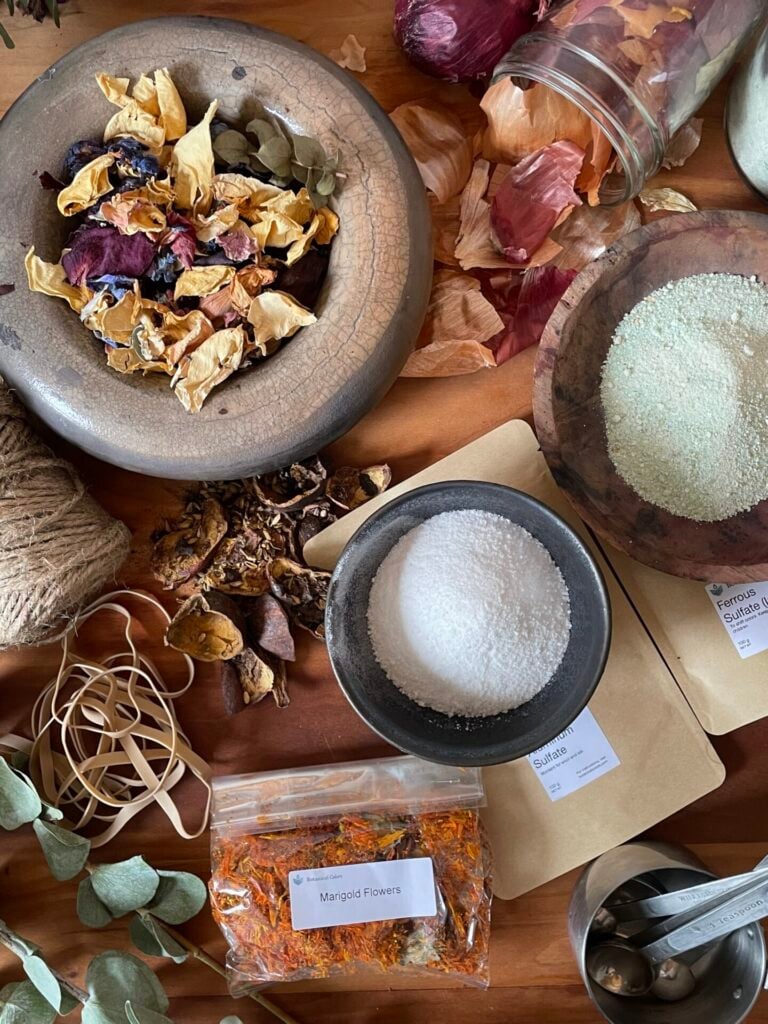
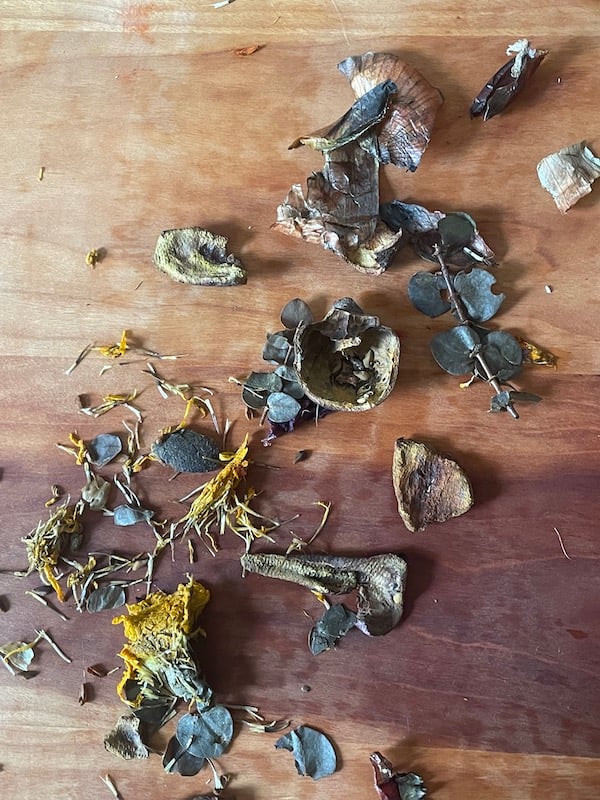
- Eco-print materials of your choosing. We recommend Botanical Colors’ raw dyestuffs like: logwood chips, marigold flowers, and ground madder root or foraged materials from your home and local supermarkets like: yellow or red onion skins, flower petals, and red cabbage, turmeric and even pomegranate peels!
For this demonstration, I will be using our marigold flowers, onion skins from my kitchen, Botanical Colors pomegranate peels and a small small sprinkle of cochineal.


- Equipment (Anything you use for this project should not be used for food anymore.)
- Tablespoon & teaspoon
- Large spoon / stirring utensil
- Bowl
- Small cup
- Steamer setup: A stainless steel or “non – reactive” pot. Natural dyes react to metals! Aluminum pots can work too but will lend to more subtle darker tones. Experiment with both and see how the colors differ.
- A colander / grill rack / sticks / steamer basket – something to rest your fabric in the pot so it doesn’t touch water!
- Paper to protect your work surface or a plastic bag.
- Mask
- Gloves
- A heat source – open fire, kitchen top, hot plate


STEPS:
- To start, you want a pair of clean socks in a light color. They should be predominantly made of cotton. Materials like polyester or acrylic don’t like natural dyes. For your very first project, we recommend Harvest and Mill Organic cotton socks (because we love them).
- Before you dye your fabric, you need to mordant it. Mordanting is the act of treating the fabric so that the dye will bond with the fibers in the textile. It improves the color and the performance of the dye. For your very first project, we recommend aluminum sulfate. Basically this is the step that lets the color stick to your fabric so it doesn’t wash out!
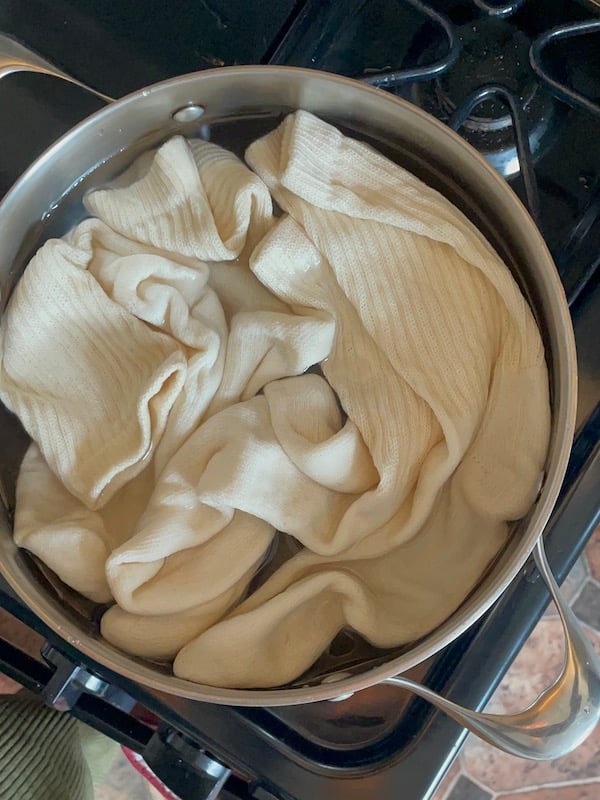
- Soak your socks in warm water so that they’re nice and wet all the way through. Set those aside. Do this for at least 20 minutes.
- Put on a mask (we know you’ve got one). Measure out one tbsp of aluminum triformate. Dissolve this in cold water in a small cup. Add about two quarts of cold water to your bucket. Add the dissolved aluminum triformate to the bucket and stir. Then add the socks to the bucket, making sure that they’re submerged. Keep them in that solution for at least four hours. You can also let them soak in the bucket overnight.
- Wearing gloves, remove the socks from the aluminum triformate solution and squeeze them out to remove excess water.
- You’re ready to bundle dye! You can save your mordant to dye more socks or textiles if you like. Seriously, you can throw them in there and walk away and come back days later when ready to dye.
- Take your colander and rest it on top of your pot. You can use normal tap water for this as we just need the steam to make the prints. Place this on top of your stove.


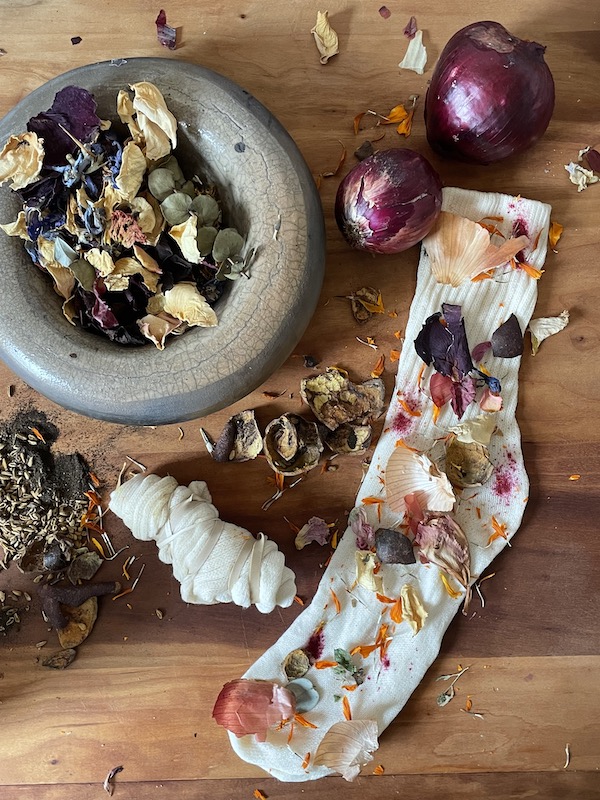
- Place your socks flattened out on a covered work surface.
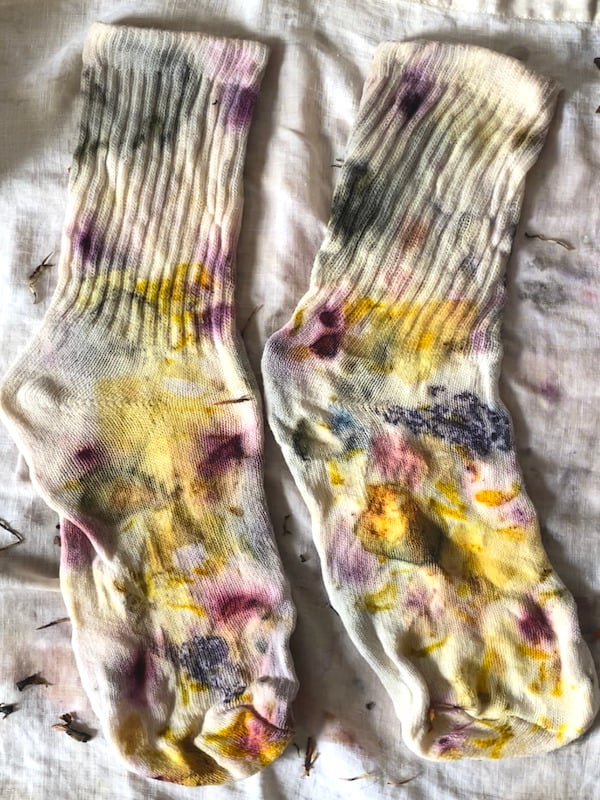
- Lightly sprinkle the dyestuffs of your choice onto the socks. This is where you get to have fun. Let your imagination run wild, there is no “RIGHT” way to lay out your pattern so go crazy!
- You can either steam them together or separately. By placing the socks one on top of the other, you will have a mirror image of your print. Make sure to also add flowers to the top of the second sock.
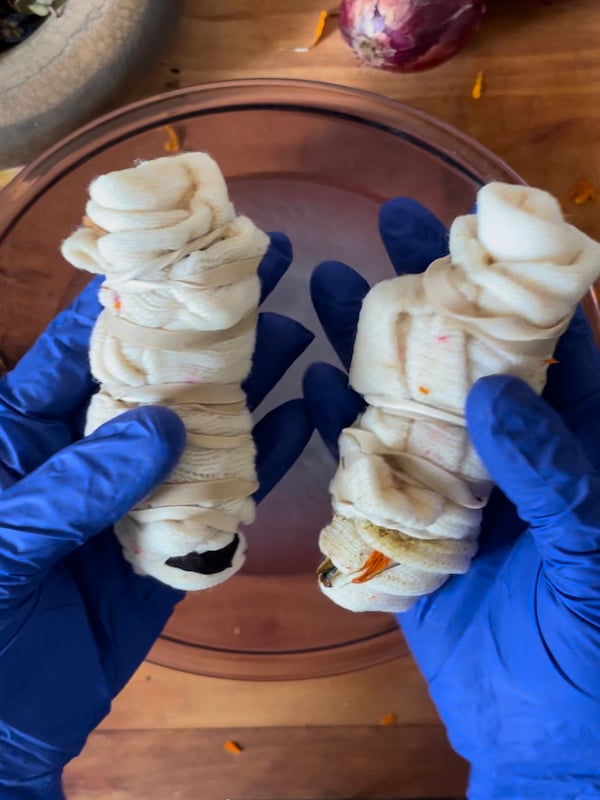
- Roll them up (together or apart), secure tightly with a couple of rubber bands. Tie them as tightly as possible.
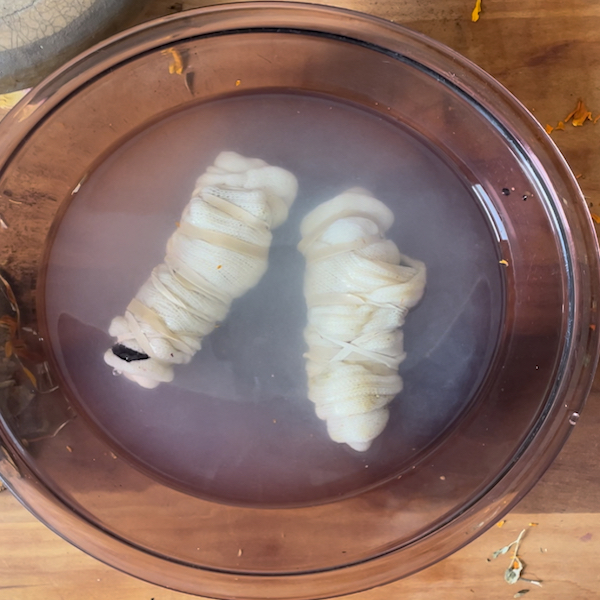
- Add one teaspoon of ferrous sulfate to one cup of vinegar in a bowl. Stir and add 2 cups of warm water to dissolve the solution. Place your bundled socks in this solution for at least 10 minutes. The iron also acts as a fixative. More iron = darker, sadder, moodier colors.
- Now place your socks on your steamer contraption! And make sure to cover with a bowl or lid so all goods are fully immersed in the steam.


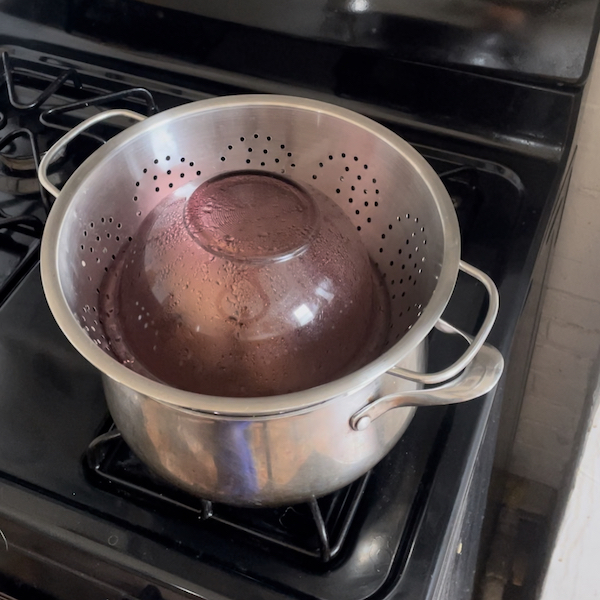
- Steam over water for at least 1 hour, adding more hot water to your steamer if needed.
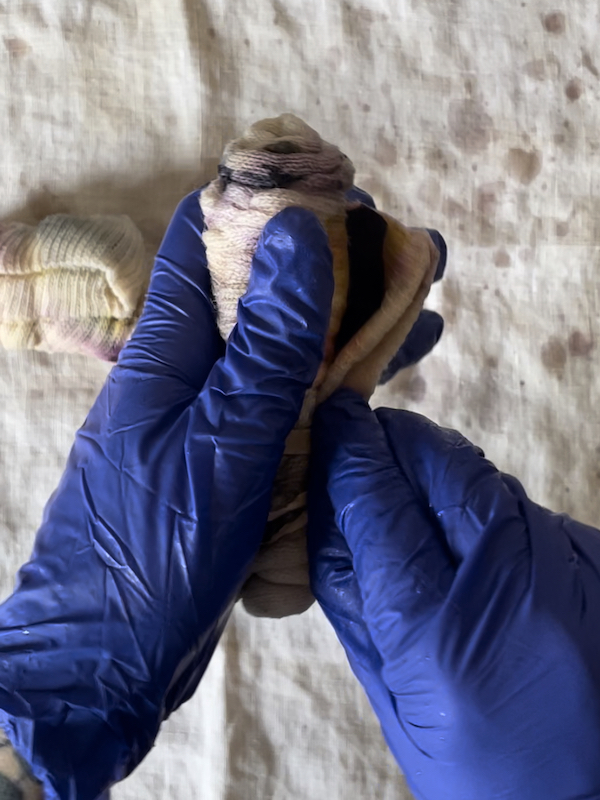
- When steaming is done, carefully remove socks from the steamer with tongs. Let them cool. Unroll and let air dry. You can rinse with cold water.
- Once dry, shake off any loose dyestuffs – save these and reuse them in another dye project!
- Rinse the socks well. Let them “cure” or dry overnight. Iron with a hot iron to set!


To keep the colors of your socks vibrant, don’t use bleach and gently wash and air dry the socks with a pH neutral soap. But if colors do fade, you can do this again. This is a great project for all of those old coffee stained garments and tea towels! The beauty of this process is that it continuously gives life to old garments.
Please send us your images or tag us on Instagram!! We love to see what you are making.
Shop our Beginner’s Dye Kit here.